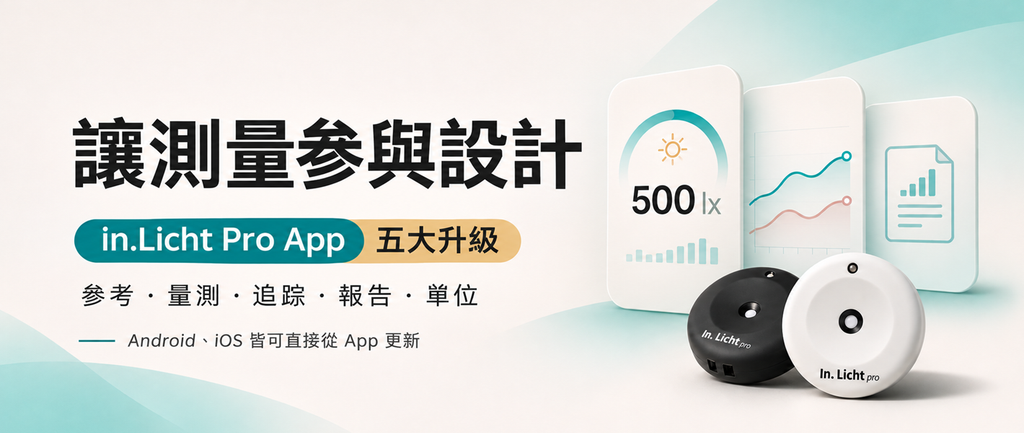
The updated In. Licht Pro App connects design references, on-site comparisons, measurement records and report exports in one workflow. Designers can document an adjustment, compare the result and return to the same evidence during the next round of refinement.
A desk may receive enough light while a nearby wall still appears dark. Reading and preparing for sleep also call for different lighting decisions, even when both scenes use warm white light. These questions become especially clear once luminaires, furniture and materials are in place.
What has changed
01 | Clearer design references for tasks and times of day
02 | Three guided on-site measurement comparisons
03 | Manual Capture and Continuous Tracking
04 | PDF and Excel report exports
05 | A choice of lux and foot-candle units
Available now. Android and iOS users can update directly from the App.
UPGRADE 01
Read the numbers in context
Measure the task plane for the task. Measure at eye level for eye-level light exposure.
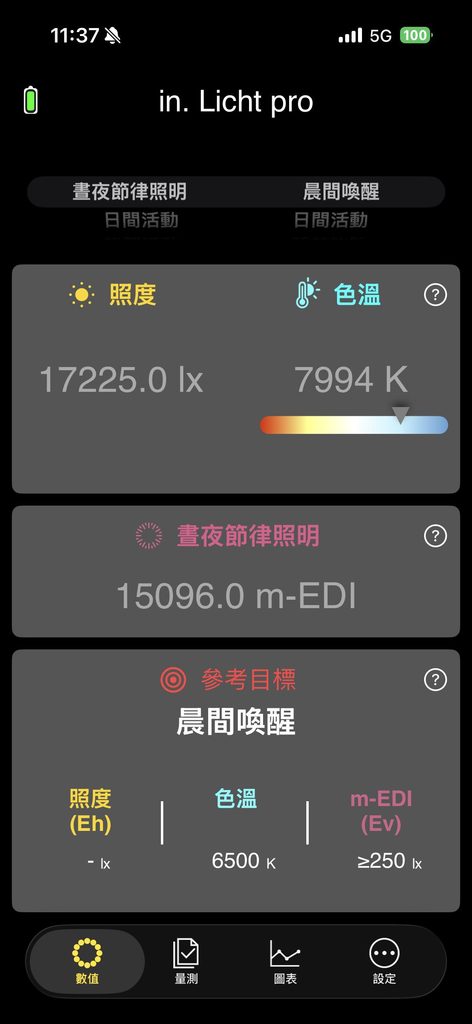
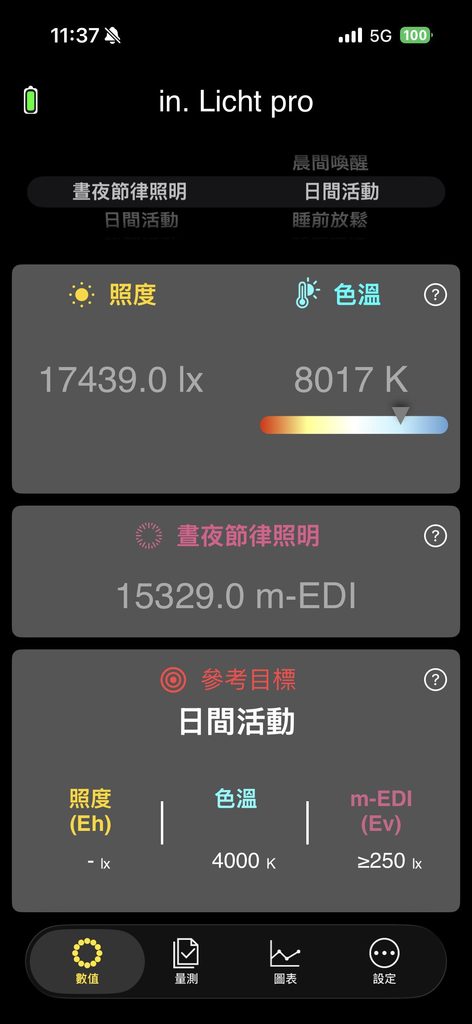
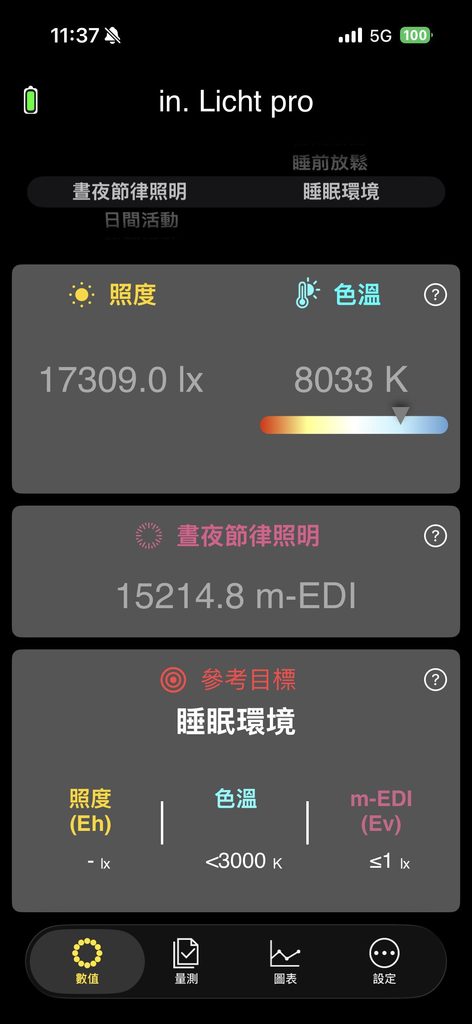
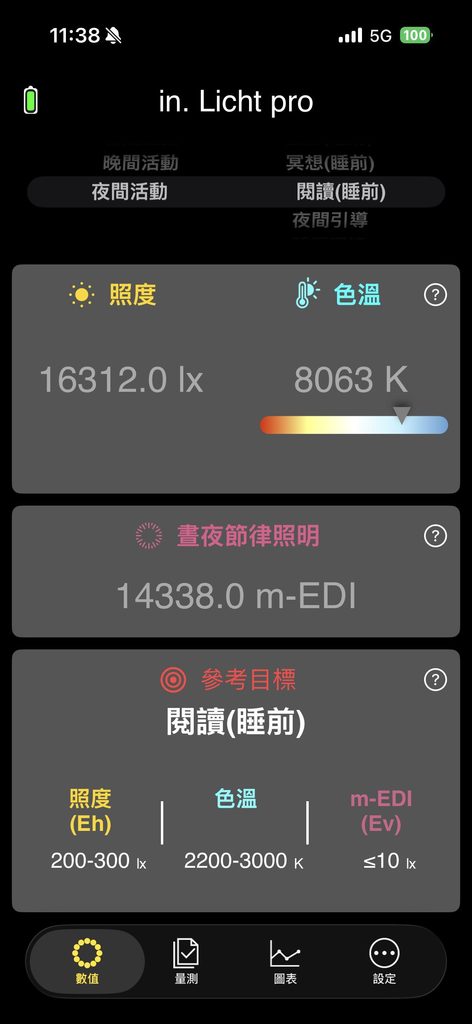
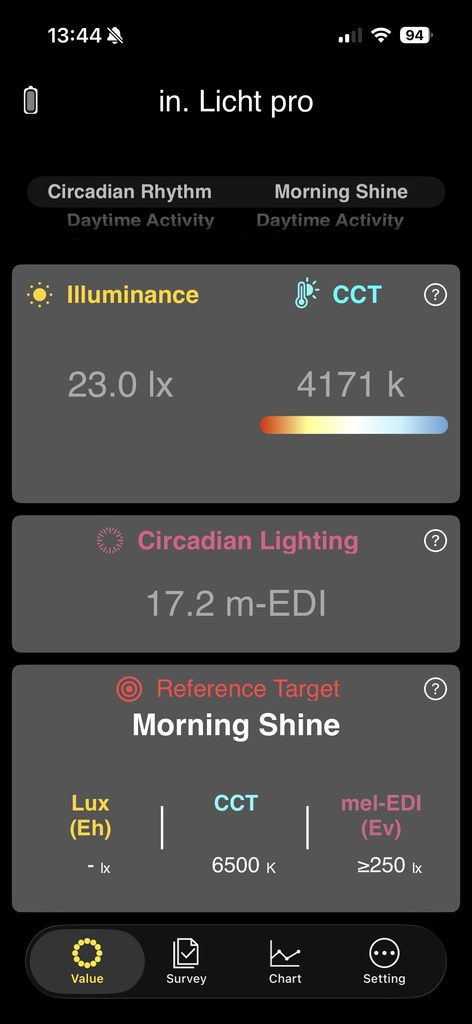
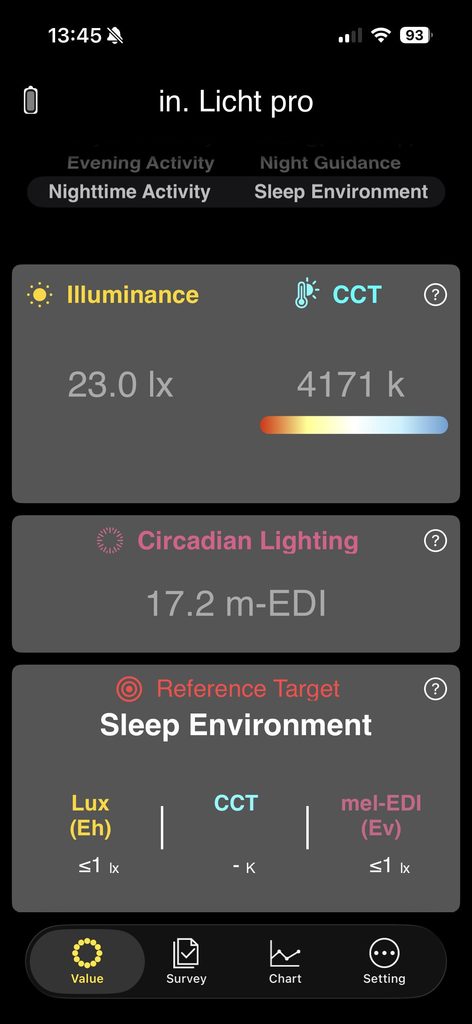
The Value screen brings illuminance, correlated colour temperature and mel-EDI into one working view. Reference Target links these readings to activities and times of day, helping the user decide where to measure and what to consider.
Three metrics with different meanings
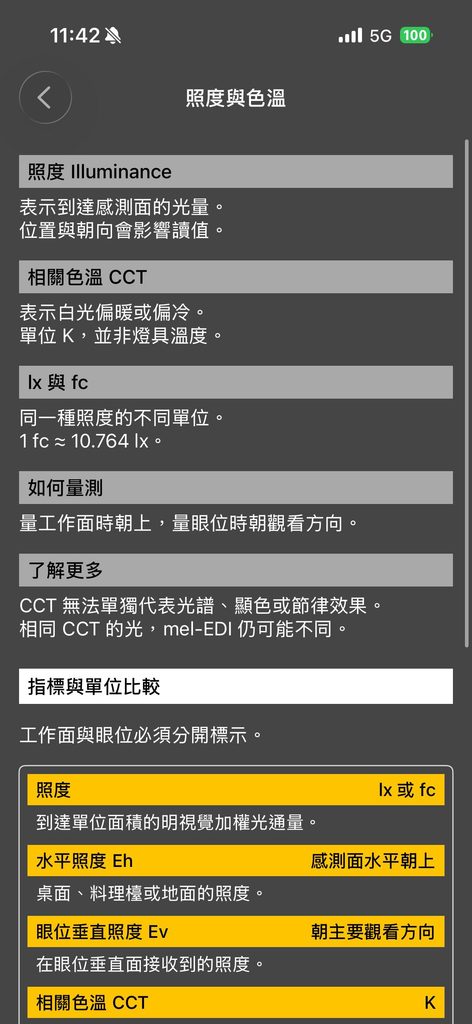
Illuminance describes the amount of photopically weighted light arriving at a surface. Measure on the book page for reading, on the worktop for food preparation, or on the floor when evaluating circulation areas.
Correlated colour temperature, or CCT, describes the warm or cool appearance of white light. It is expressed in kelvin. It does not describe the complete spectrum and cannot, on its own, determine mel-EDI.
Melanopic equivalent daylight illuminance, or mel-EDI, expresses the illuminance of standard daylight D65 that would produce the same melanopic irradiance as the light being assessed. It is expressed in lux. For eye-level assessment, place the sensing surface at the actual eye position and face the main viewing direction.
Horizontal illuminance, Eh, and vertical illuminance, Ev, describe different measurement orientations. A vertical wall measurement and a vertical eye-level measurement also represent different locations. Record both the position and the orientation.
References across the day
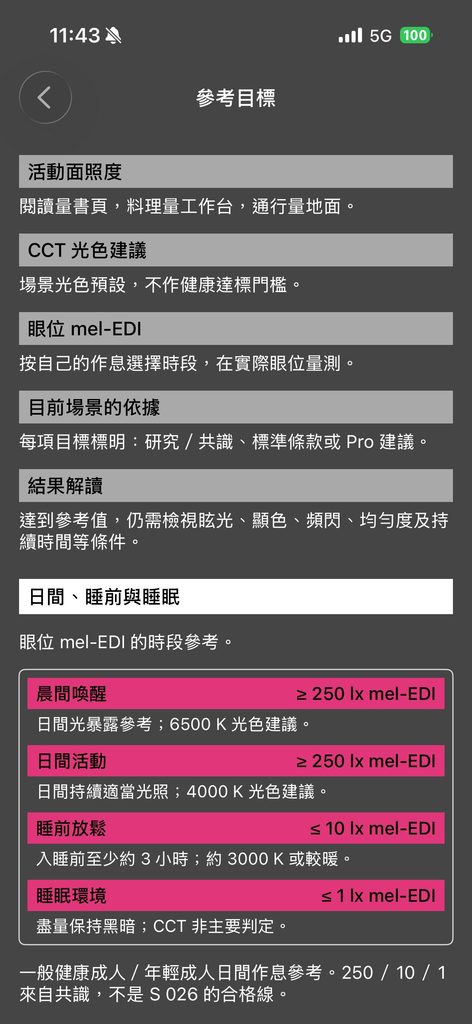
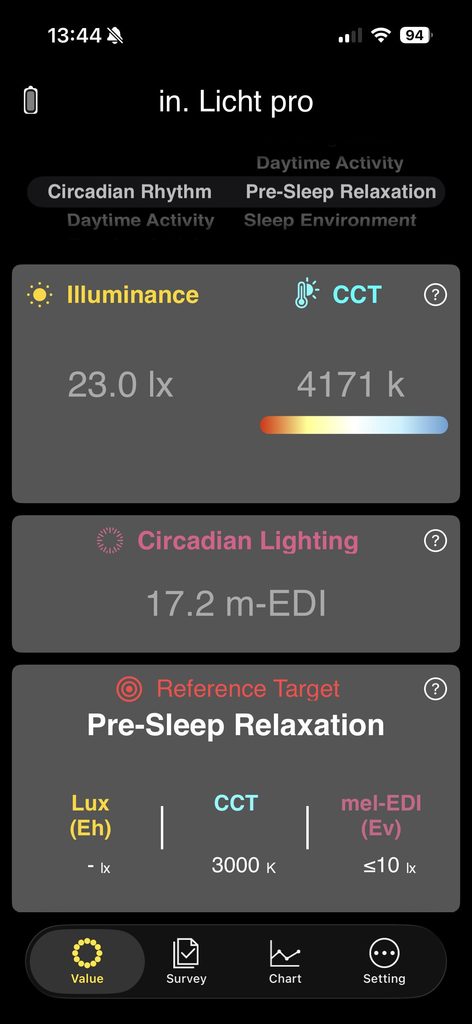
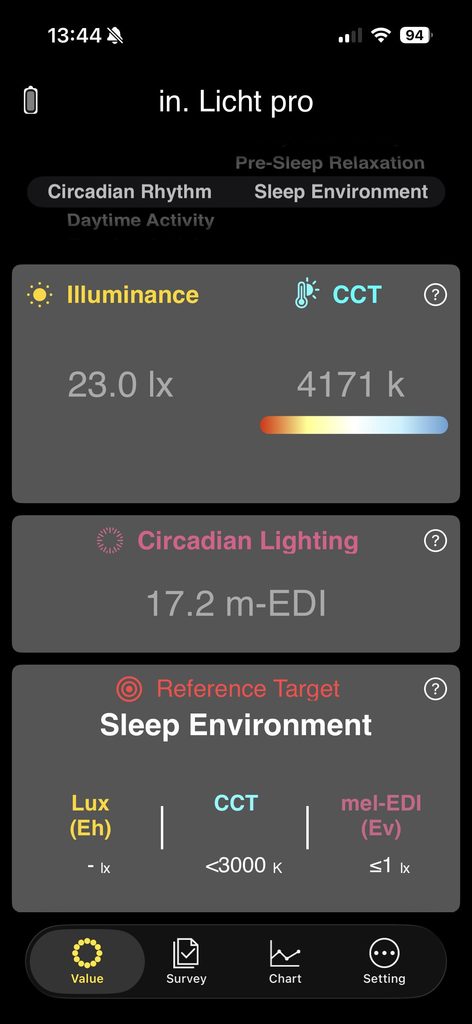
The App presents a daytime eye-level reference of at least 250 lx mel-EDI, a pre-sleep reference of no more than 10 lx mel-EDI, and a sleep-environment reference of no more than 1 lx mel-EDI. The pre-sleep reference relates to approximately the three hours before bedtime.
These are the adult, regular-day-schedule consensus references cited by the App. They are not universal pass or fail limits defined by CIE S 026 and do not predict an individual’s sleep quality or health outcome. Exposure duration and timing remain relevant. CCT scene presets are separate suggestions, not health thresholds.
Help at the point of use
The question-mark buttons explain illuminance, CCT, unit conversion, mel-EDI and the basis of the references. The educational material also introduces the spectral weighting functions associated with five photoreceptor classes, explaining why one light source can be described by several different metrics.
Pro estimates mel-EDI from sensor signals and an algorithm. Its usable range and accuracy depend on calibration and validation conditions. The help content supports interpretation alongside the reading.
Morning Shine pairs an eye-level reference of at least 250 lx mel-EDI with a 6500 K scene suggestion. The daytime scene uses the same mel-EDI reference with a different colour-temperature suggestion. A change in CCT does not replace an eye-level measurement.
Before sleep, the reference changes to no more than 10 lx mel-EDI. During sleep, the priority is darkness, with the App presenting no more than 1 lx mel-EDI as its eye-level reference. A warm CCT alone does not ensure low mel-EDI.
Readings and targets are separate.
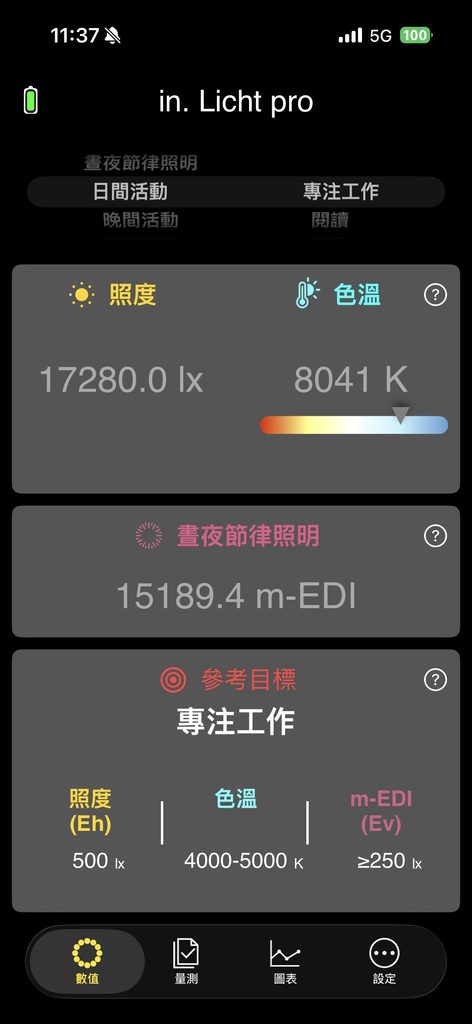
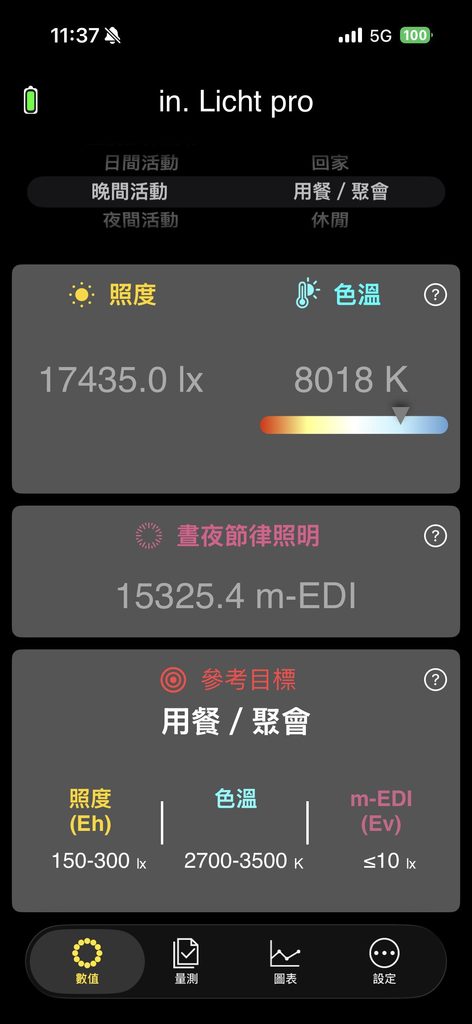
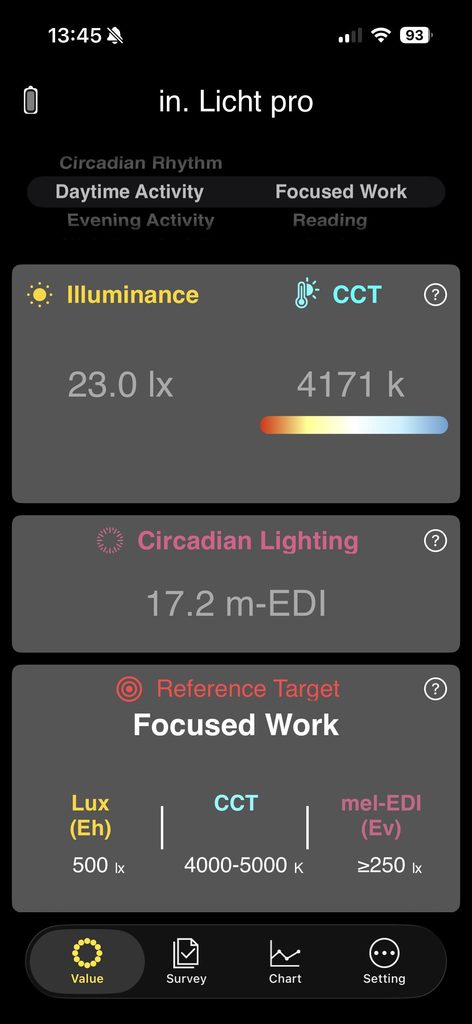
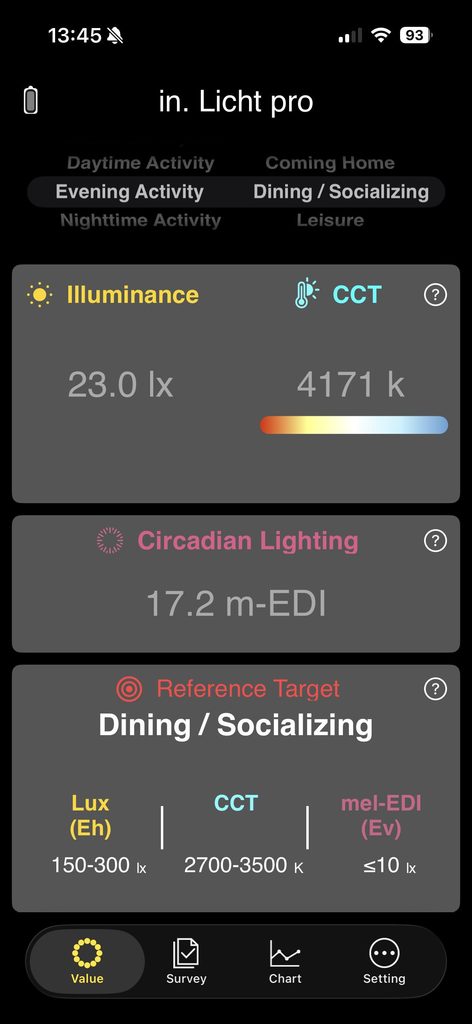
The example screens show the same live readings while different reference modes are selected. Changing the menu changes the reference shown; it does not demonstrate that the environment meets the target or that the App has automatically changed the luminaires.
The article uses mel-EDI consistently. Some live-reading labels in the supplied screenshots use the shorter form m-EDI.
For Focused Work, the App provides a 500 lx task-plane preset and a 4000–5000 K colour-temperature suggestion. Measure the work surface and the eye position separately; desk illuminance cannot establish eye-level mel-EDI.
Dining / Socializing presents 150–300 lx and 2700–3500 K as Pro scene suggestions. The displayed eye-level reference of no more than 10 lx mel-EDI should be interpreted in relation to the pre-sleep period, rather than applied indiscriminately to every evening activity.
For pre-sleep reading, the App’s scene guidance suggests 200–300 lx on the page, adjusted to visual needs. A well-shielded local reading light can help retain useful light on the book while reducing unnecessary light reaching the eyes. Recheck both positions after adjusting the lamp.
The Nighttime Activity sleep preset also displays a horizontal illuminance suggestion. Keep this distinct from the eye-level mel-EDI reference. Evaluate the actual sleeping position, and preserve safe movement where nighttime guidance is needed.
Scene presets provide a starting point for discussion. Select project criteria according to the space, visual task, user needs and applicable requirements. Distributors can use these comparisons in demonstrations; manufacturers can use the resulting feedback when discussing light distribution and control settings.
UPGRADE 02
Choose the comparison that answers the question
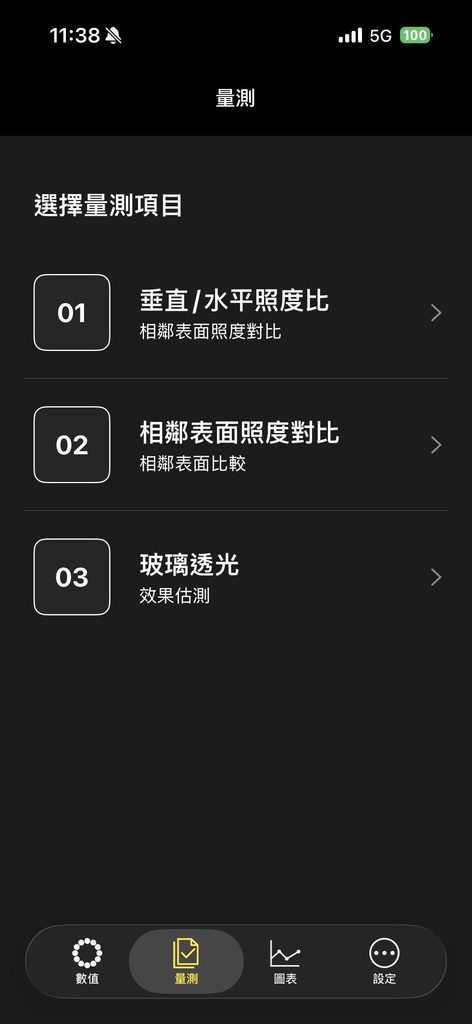
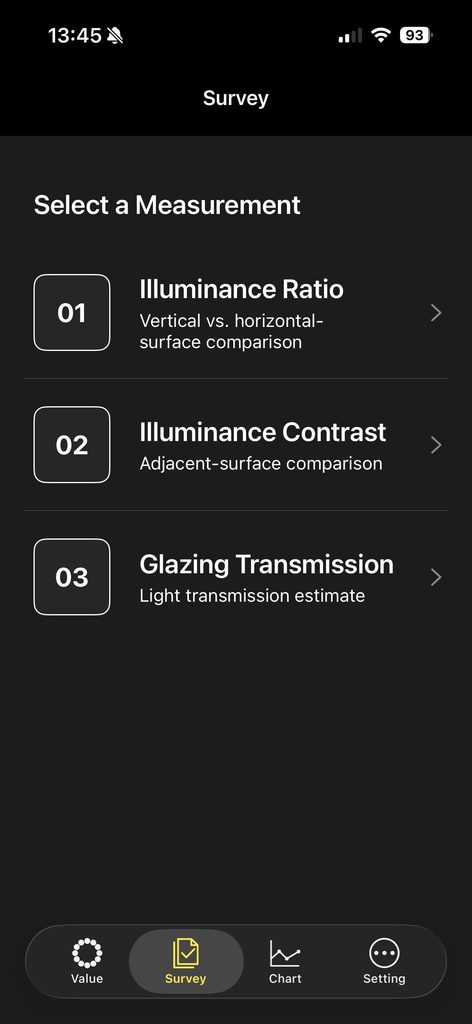
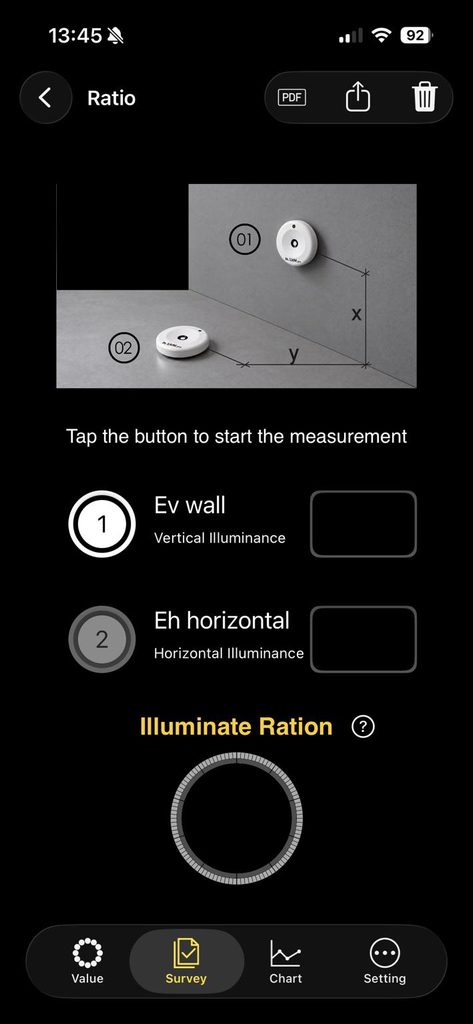
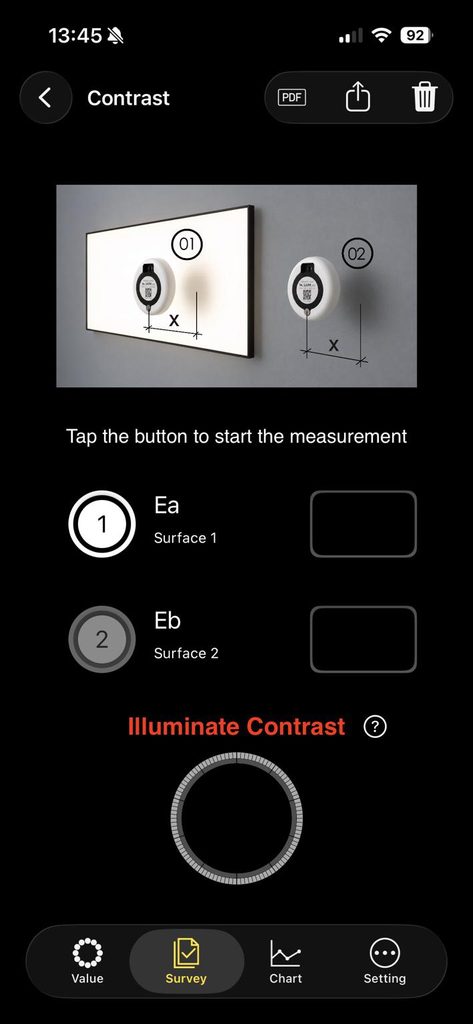
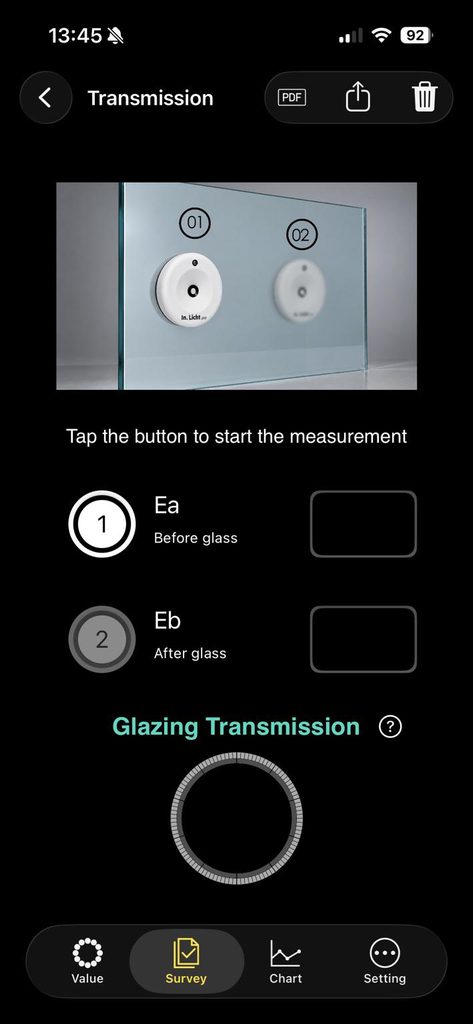
The Survey screen provides three guided comparisons: Illuminance Ratio, Illuminance Contrast and Glazing Transmission. Each separates the measurement into steps so that the user can record and repeat the comparison.
The English Survey menu groups the three measurement workflows.
Vertical and horizontal illuminance
Measure a selected vertical surface and a selected horizontal surface to compare the distribution of incident light. For example, record a wall and desk before and after adding wall lighting. The ratio describes the relationship between those readings; it cannot establish visual comfort by itself.
Adjacent surfaces
Compare illuminance at two neighbouring surfaces when reviewing wall washing, accent lighting or local fill light. Surface reflectance and gloss affect perceived brightness, so materials remain part of the interpretation.
Before and after glazing
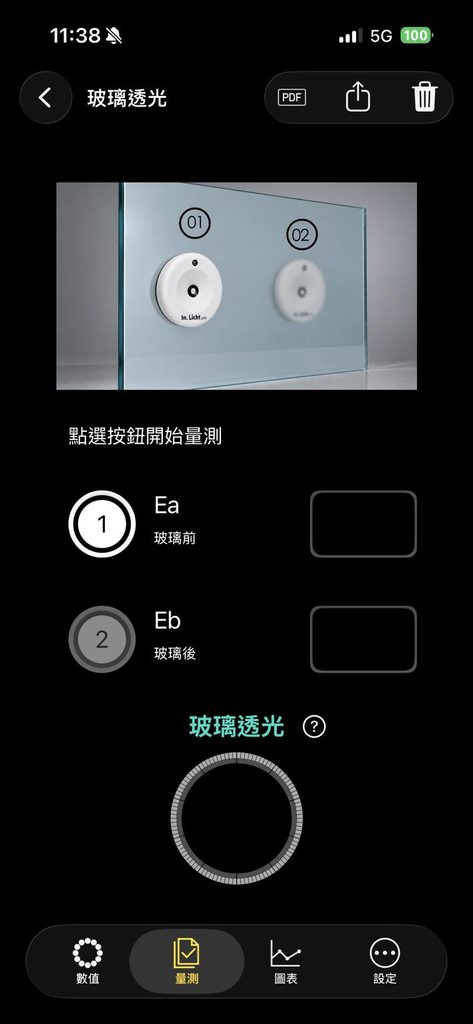
Record illuminance before and after glass to explore how glazing, film or a shading condition changes the light reaching the measurement position. Keep geometry and lighting conditions controlled during the comparison.
GUIDED MEASUREMENTS
Capture each condition consistently
Left: vertical / horizontal ratio. Centre: adjacent-surface comparison. Right: glazing transmission estimate. Original English interface labels are retained.
Record the geometry
For repeat measurements, note the sensing position, direction, distance and lighting state. When comparing two readings, check whether daylight or another source changed between the captures. Consistent conditions make the result easier to explain and reproduce.
Keep illuminance separate from luminance
Illuminance measures light arriving at a surface. Luminance concerns light leaving a surface in a particular direction. An illuminance ratio may help interpret approximate brightness relationships for similarly reflecting, diffuse surfaces, but it is not a direct luminance measurement of a screen, lightbox or material.
The comparisons support design decisions; they do not by themselves establish compliance with WELL luminance-ratio criteria. Glazing results are on-site estimates under the recorded conditions and do not replace laboratory measurements of a material’s visible light transmittance.
UPGRADE 03
Record selected states and changes over time
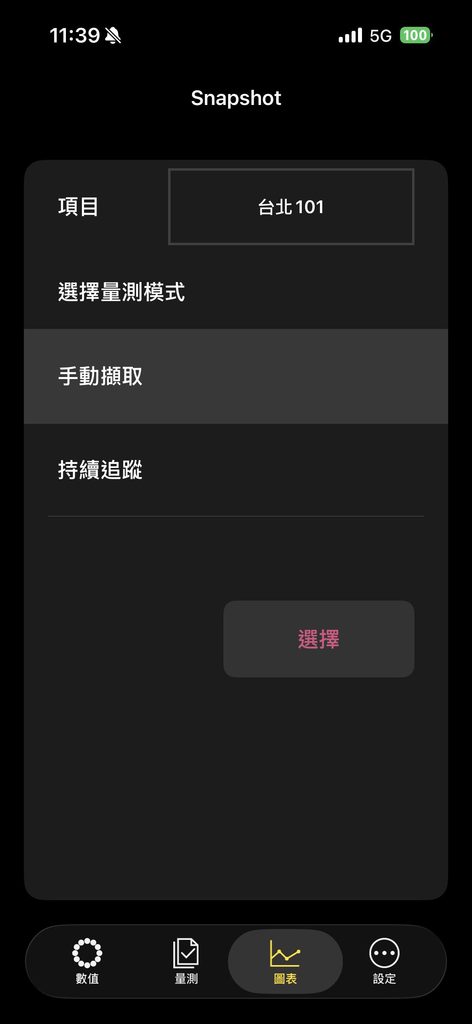
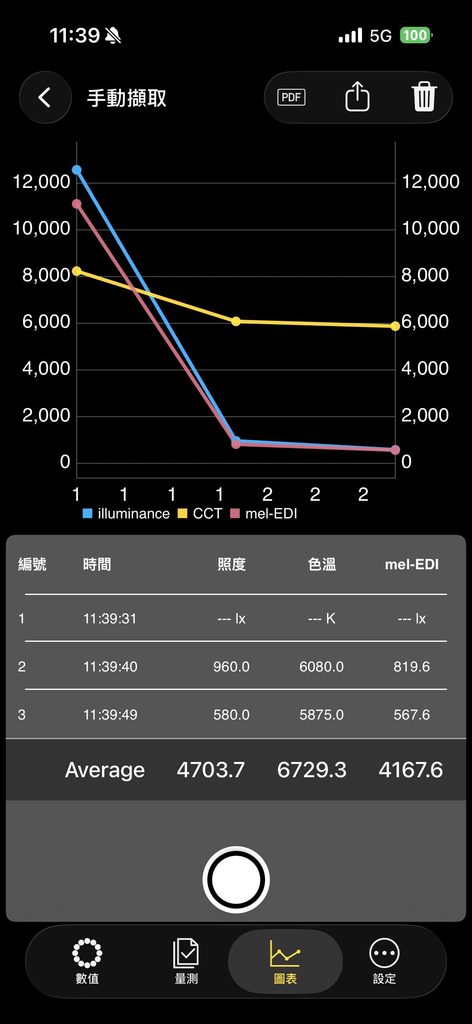
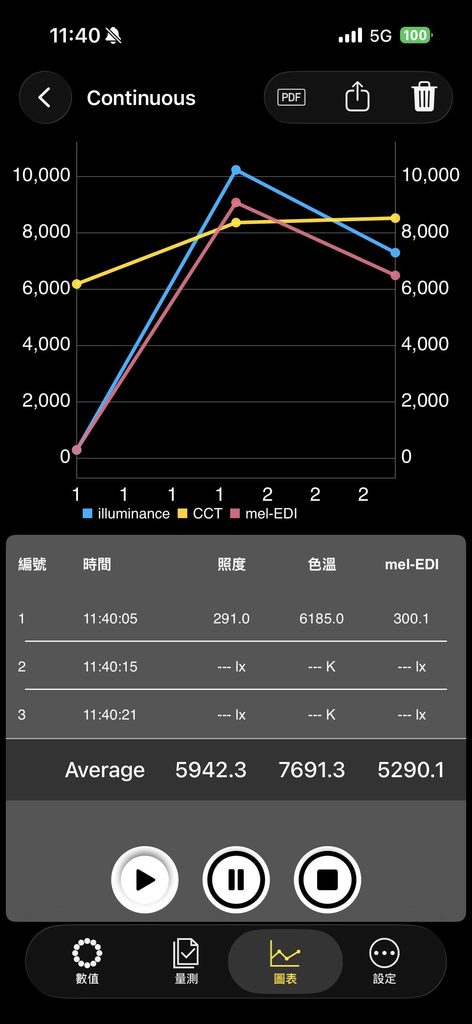
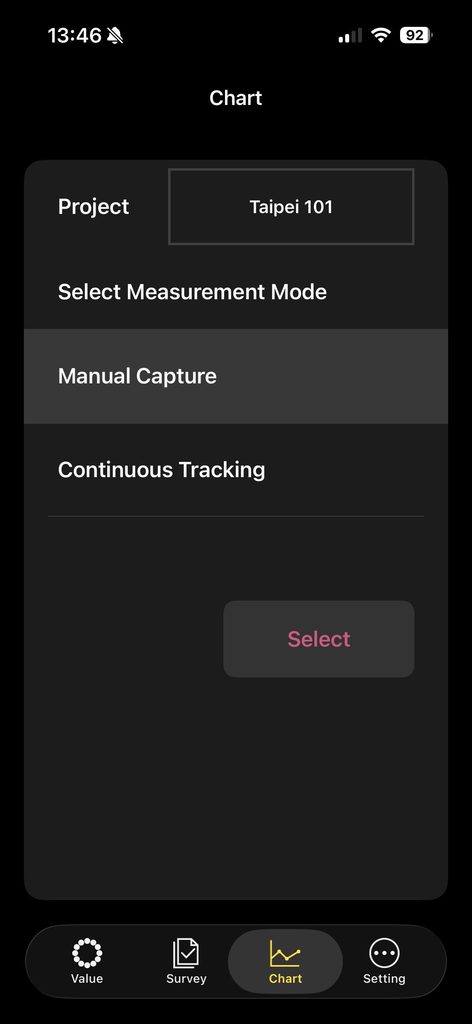
The Chart screen offers Manual Capture and Continuous Tracking. Add a project name and record notes so that each result retains its on-site context.
Name the project and choose the measurement mode. Taipei 101 is a sample entry in the interface, not a project endorsement.
Manual Capture
Capture a reading after reaching a measurement point or completing a lighting adjustment. Use it to compare selected locations, preserve before-and-after results or document a sequence of scenes. The record includes time, illuminance, CCT and mel-EDI. Identify each point in the notes and keep position and orientation consistent when comparing the same point.
Continuous Tracking
Keep Pro at a fixed position and record at the selected interval to follow daylight changes, blind adjustments or scene transitions. Start, pause and stop controls let the recording follow the task. Fixed-point tracking describes variation over time; readings from different points describe differences between those selected locations.
Maintain the device connection and the App’s required operating conditions, then check the record for completeness. Second-scale logging is intended for slower lighting changes and is not flicker measurement.
UPGRADE 04
Turn measurements into a useful handover
PDF supports review and communication. Excel supports data organisation and further analysis.
A reading becomes more useful when the client can understand it and the team can return to it. Exported reports help designers explain what changed, help distributors document demonstrations, and give manufacturers feedback from real installation conditions.
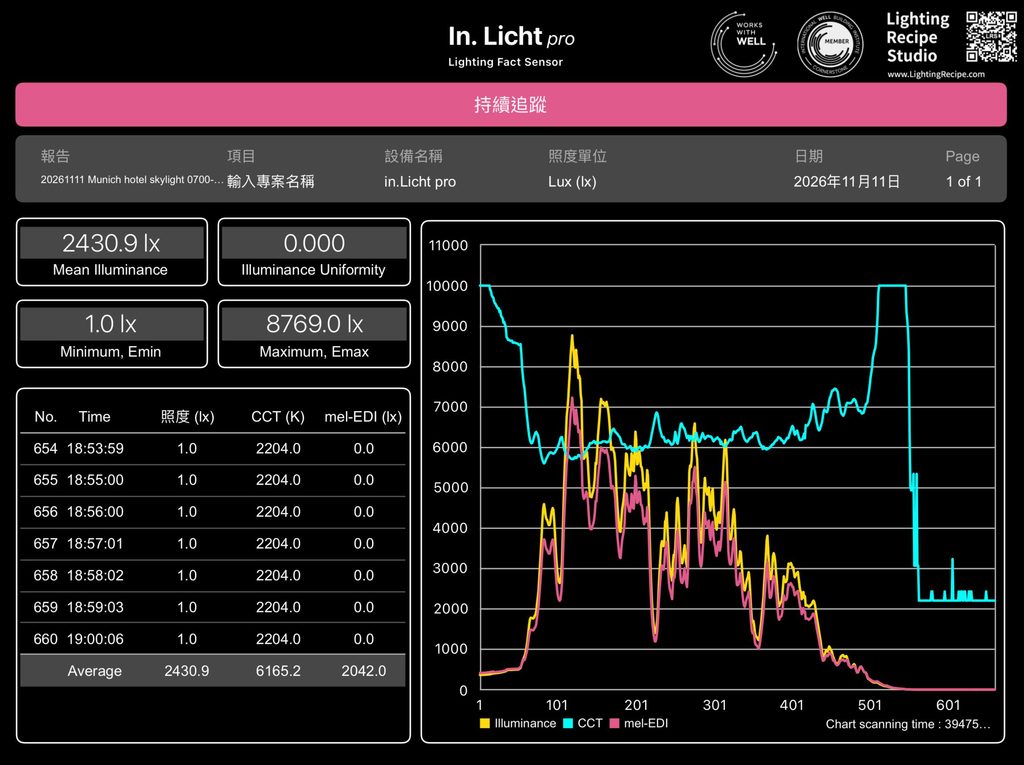
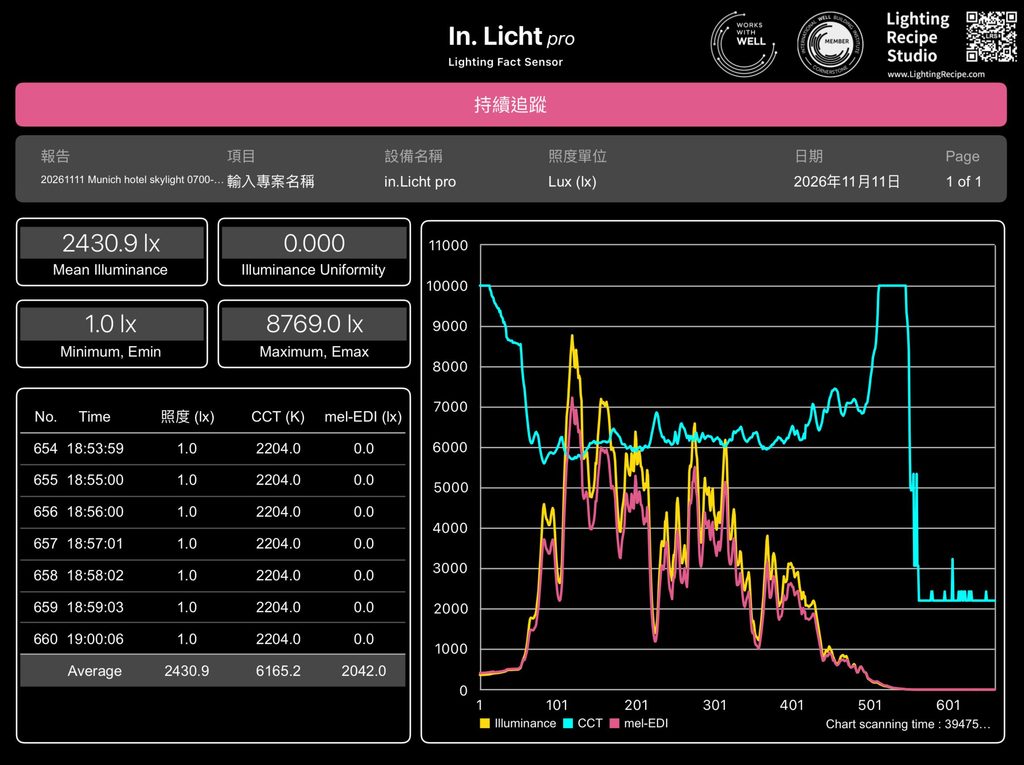
Original graphical report: continuous tracking at a Munich hotel skylight on 11 November 2026. Original export labels are retained.
Curves and summary values help identify periods worth reviewing. Compare them with the measurement position, weather, shading and control-operation notes. The curve alone does not establish the cause of every change.
Include the project name, measurement position and on-site notes with the report. This gives the next review or repeat measurement a clear starting point.
REPORTS AND ANALYSIS
Keep the data connected to its conditions
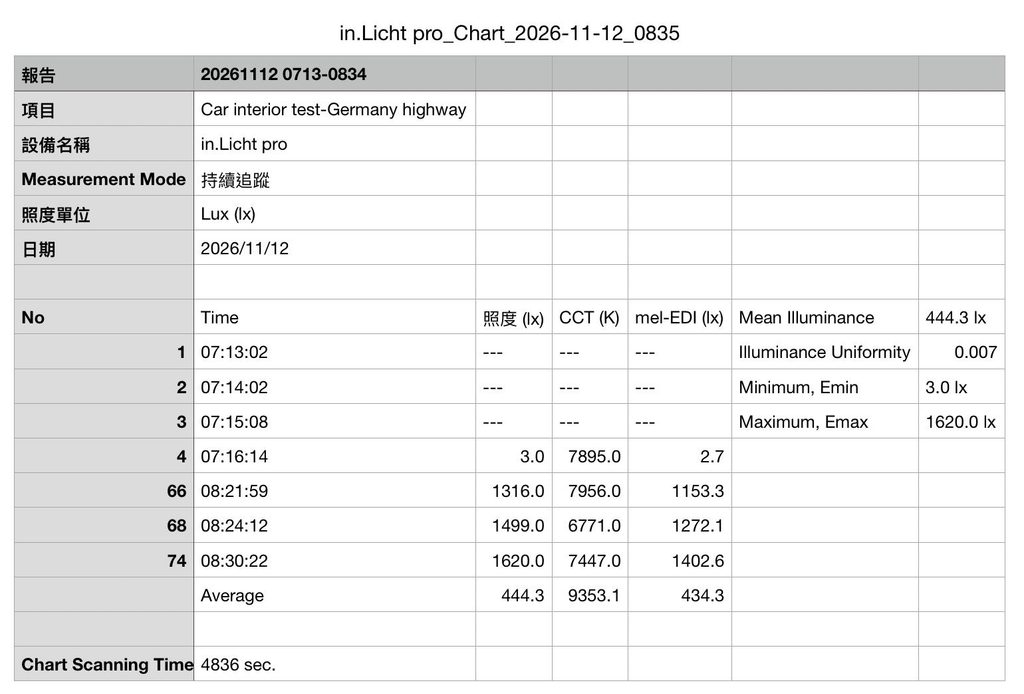
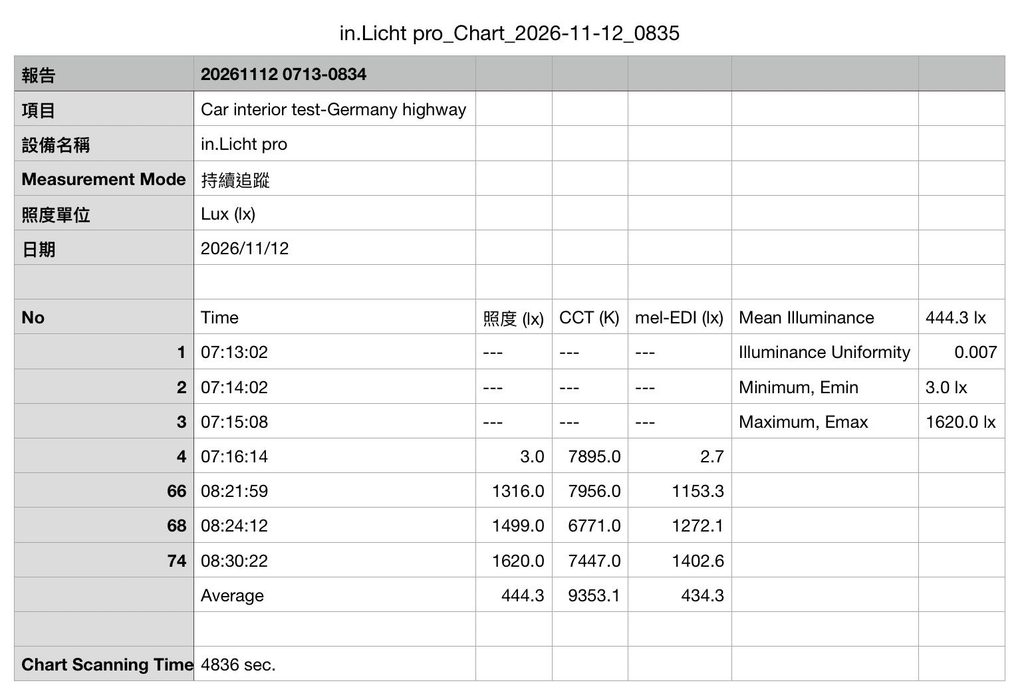
Original spreadsheet example: a separate vehicle-interior test on a German highway on 12 November 2026. This is a different dataset from the hotel report, not a matching export of it.
A spreadsheet makes it easier to locate individual timestamps, check values and bring the record into a team’s own analysis. Vehicle measurements also illustrate why position, direction and time matter: one average cannot describe every condition encountered during a journey.
Three checks before interpreting a report
Time and space. A minimum-to-average relationship calculated across a time series is not the spatial illuminance uniformity of a task plane. Interpret the displayed Illuminance Uniformity field according to the sampling method; it does not establish WELL compliance.
Metrics and units. Illuminance and mel-EDI use lux; CCT uses kelvin. Overlaid curves can help locate changes, but their relative heights do not directly compare lighting effects.
Missing and zero values. A dash is not zero, and a displayed 0.0 does not prove that no light was present. Confirm missing records, the valid measurement range and the data included in summary statistics before drawing conclusions.
UPGRADE 05
Use the illuminance unit your project expects
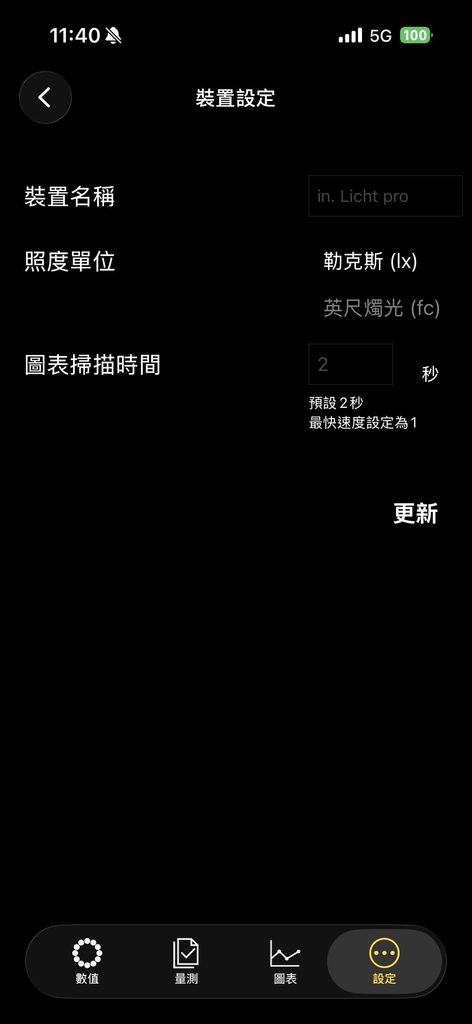
Choose lux or foot-candles in Settings to match the project’s usual working units and reduce manual conversion.
1 fc ≈ 10.764 lx
For example, 500 lx is approximately 46.5 fc. Changing the unit changes how illuminance is expressed; it does not change the measurement itself or improve accuracy. Settings also provides the chart scanning interval.
A practical design workflow
Choose a reference. Identify the activity, time of day and measurement plane.
Capture the conditions. Record the task plane, eye position or selected comparison.
Adjust and remeasure. Change output, direction or scene, then compare the results.
Track the process. Observe daylight or control changes from a fixed position.
Export and discuss. Share the record and its context with the client or project team.
For designers, this creates a record linking design intent with on-site performance. For distributors, it supports showroom demonstrations, option comparisons and handover services. For manufacturers, it connects product discussions with the space and conditions in which the product is used.
Update the App and begin
All five upgrades are now available. Android and iOS users can update directly from the App.
New users can contact Lighting Recipe Studio or a local partner to learn about the device and its applications. Bring Pro to the next lighting adjustment, and keep a record the team can return to.
Lighting Recipe Studio · In.Licht Pro App screens illustrate functions and reference presets. Select project criteria using applicable requirements and actual conditions. On-site estimates do not replace professional certification.
Celebrate the launch of our upgraded In. Licht Pro App!
As a special thank-you to our loyal fans who have been following and supporting us, we’re offering an exclusive discount just for you!
These promo codes are exclusively available to our dedicated followers.
Enjoy 30% OFF PRO on Amazon!
US: HPBPP7O4 Deutschland: BEWZJ1YI UK: WWQRH7WV
Thank you for being part of our journey. Enjoy your exclusive discount!
We've detected you might be speaking a different language.
Do you want to change to:

 English
 Chinese (Taiwan)
 Chinese (China)
 German